
Stock libraries grow quietly. A pack here, a bundle there, and one day you own a few hundred gigabytes of clips, mattes, skies, textures and photobashing plates — and you still end up dragging the same three files out of Explorer because finding anything else takes too long.
Media Browser Pro is the panel I built to fix that. Here is how it is put together.
One library, every folder
You start by pointing the panel at your folders. Add Media Directories opens the full OS folder dialog — select several at once — or you can paste a path. Each directory gets an organization (the vendor or source, like Big Films or Photobash) and is split into packs automatically from its sub-folders.

Indexing runs in the background. ffmpeg and ffprobe read the metadata and build thumbnails, audio waveforms and scrub previews, several files at a time — by default one fewer than your CPU cores, so the host stays responsive.
Search that keeps up
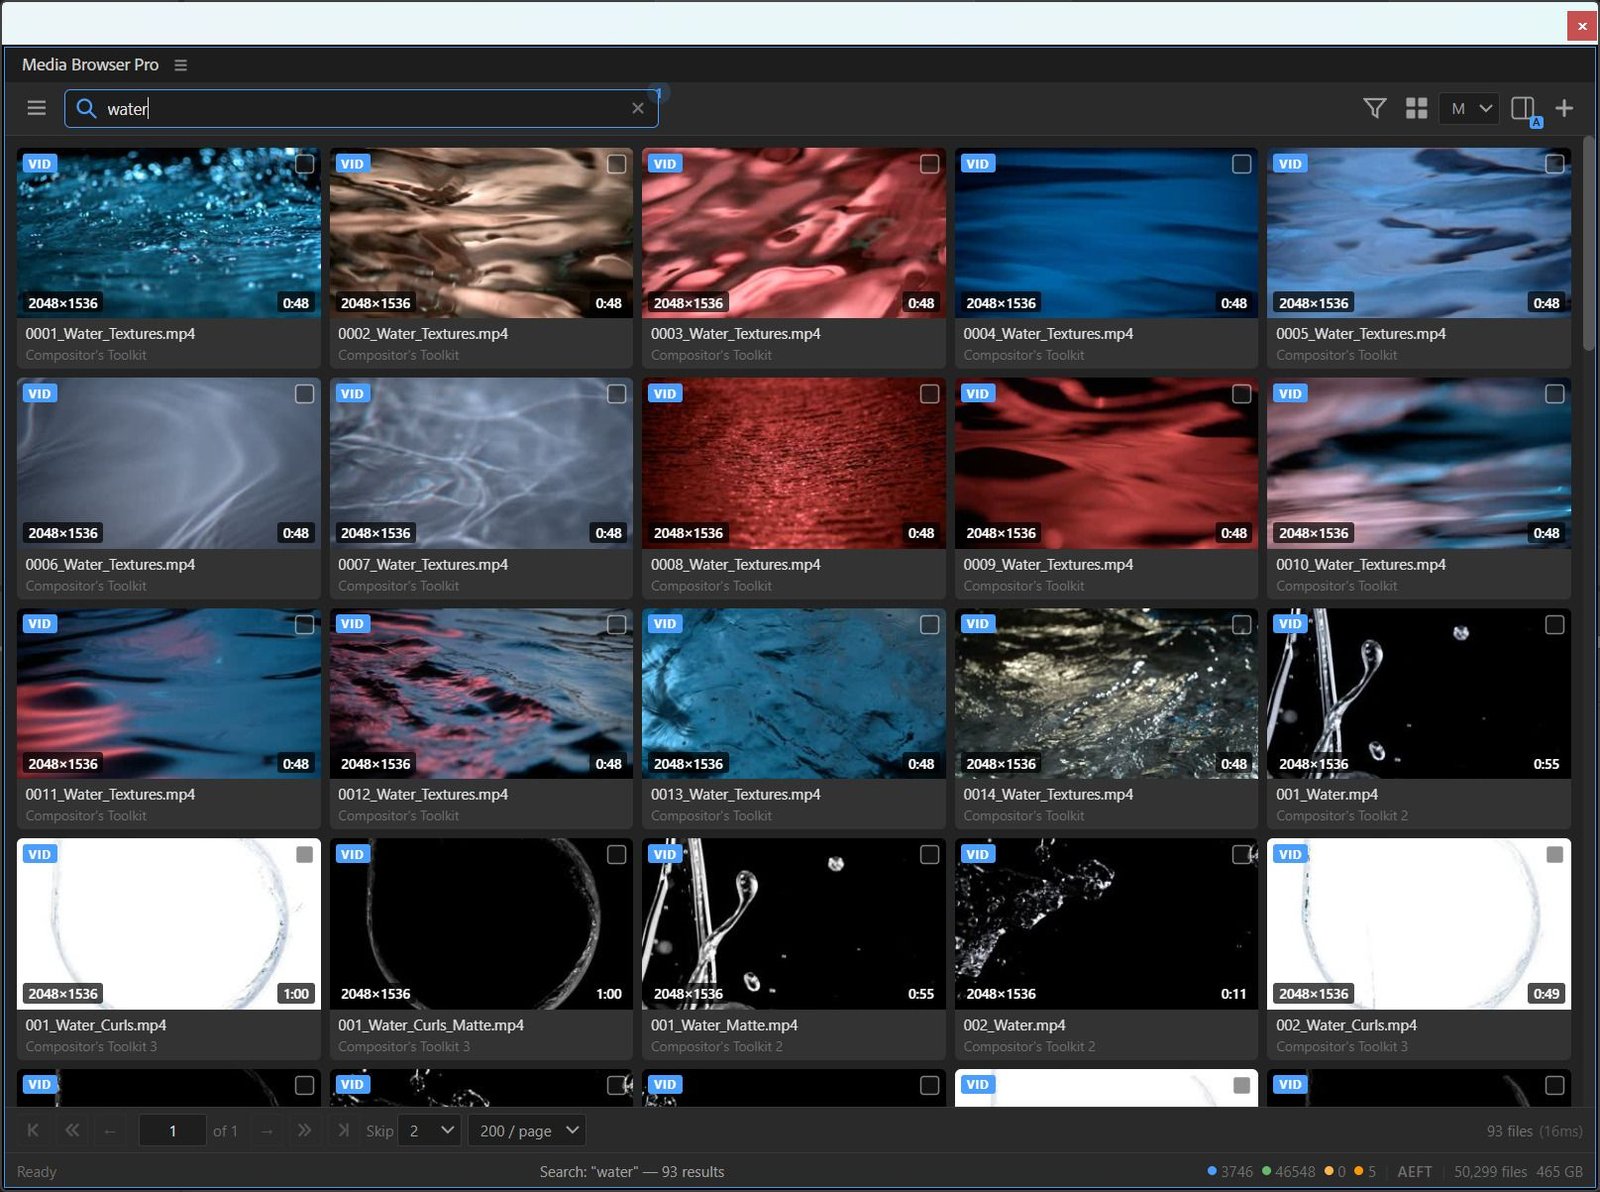
Type in the search bar and the grid answers as you type. On a 50,299-file library, a search for liquid came back with 104 results in 28 ms. Recent searches are remembered (with their result counts) so you can jump back to them.
The sidebar narrows things further: type filters for video, stills, audio and graphics, your directories, organizations and packs, and tags. Tags are added from metadata as files are read — resolution (HD, FHD, 4K, 8K), frame rate, codec, orientation, clip length, alpha — and you can add your own to any selection.

See before you import
Every card shows its resolution and duration. Hover a video card and move the pointer across it to scrub through the clip — left edge is the start, right edge is the end. Nothing plays on its own, so a grid of two hundred clips stays calm.
Switch between grid sizes or the list view, which adds sortable columns for type, resolution, duration, size and tags.
The Details panel shows everything about the selection: type, extension, size, resolution, duration, frame rate, codec, alpha, colour space, its organization, pack and folder, the full path, and its tags. Reveal opens it in Explorer.
Import like you mean it
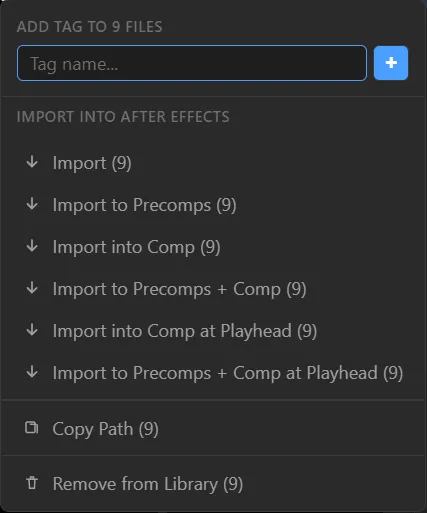
The Import button does what you expect. The import menu does more:
- Import — into the project.
- Import to Precomps — each clip wrapped in its own precomp.
- Import into Comp — placed in the active comp.
- Import to Precomps + Comp — both.
- …at Playhead — the same, starting at the current time.
Modifier keys map straight onto those: by default Ctrl wraps in a container, Shift places into the active comp, Alt positions at the playhead. So Ctrl+Alt+Shift+Click imports nine selected clips as nine precomps, stacked in your comp at the playhead. The same keys work when you drag files out of the panel.
In Premiere Pro, the same actions target sequences; in Photoshop and Illustrator they place linked files into the active document.
Look after the library
A big library needs maintenance, so the panel has a whole section for it. Repair only regenerates what is missing (a thumbnail deleted from disk, a file that has never been read). Rebuild throws it away and starts again. Check Folders counts everything and generates anything missing in one pass. Clean Database analyses what the library is carrying that it no longer needs — and never touches your media.
When you change machines, Migrate Library exports your directories with their thumbnails, waveforms and previews (or without the previews, which are the largest part and the cheapest to regenerate) and imports them on the other side.
Make it yours
Six themes — Adobe Dark, Adobe Light, Slate, Nord, Dracula and Solarized Light — or Match Host to follow the application. Multi-level sorting. Re-mappable modifier keys. Page size, page-jump size, scrub behaviour and how many files to process at once.
That is the tour. The documentation covers every option in detail, and the tutorials walk you from first folder to first precomp.
